 CastCheck
Reading the four outputs
Common colors
| Display | Meaning |
|---|---|
| Red | Risky area (what it means on each tab is shown in the bar at the bottom of the screen) |
| Green to yellow | Relatively safe side |
| Purple | Outside the guaranteed range. The method cannot assess that area. It means neither risky nor safe |
| Haze (3 shades) | A warning about a property: porosity tends to form dispersed. It does not go away when you change the rigging |
| Void marker (sphere) | Where porosity is expected to remain. The sphere size is a guide to its scale |
| ▲ | A calibration mark at a position that this tool’s calculation cannot explain (another cause is suspected) |
The notes bar at the top (when there are two or more notes) and the formulas under the tabs can be collapsed with 〔▼ … — collapse〕. Risky lines, “could not compute …” and “Calibration applied” stay visible even when collapsed, and the bar opens by itself when a new note appears after re-analysis. The printout (PDF) includes everything, collapsed or not.
Riser, Shrinkage and Surface sink estimate, from the geometry, where the casting solidifies last (temperature over time is not tracked). Filling follows the flow path and adds up how hard it is for the metal to flow.
Riser tab — are the risers you placed working?
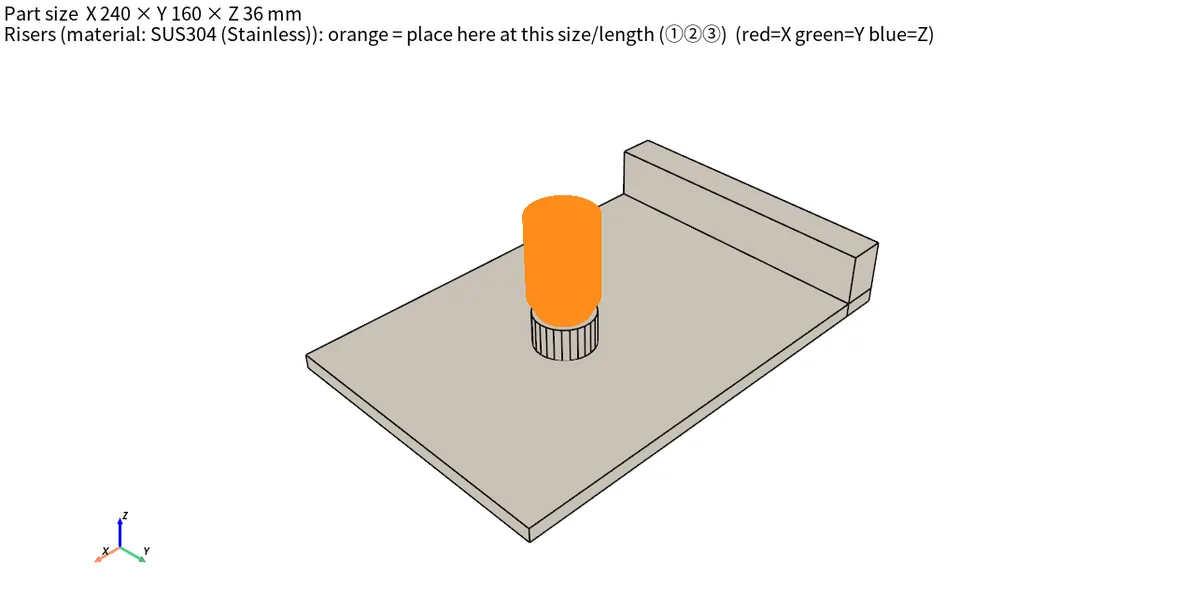
It recalculates with your risers included and judges by whether the last-to-solidify area of the part has moved into the riser.
“Capped at max” means that making that one riser any larger is no longer practical. Look at adding risers or moving them instead.
A “not enough feed metal” warning means the riser volume is short of the shrinkage in the area that riser feeds.
Shrinkage tab — where it solidifies last
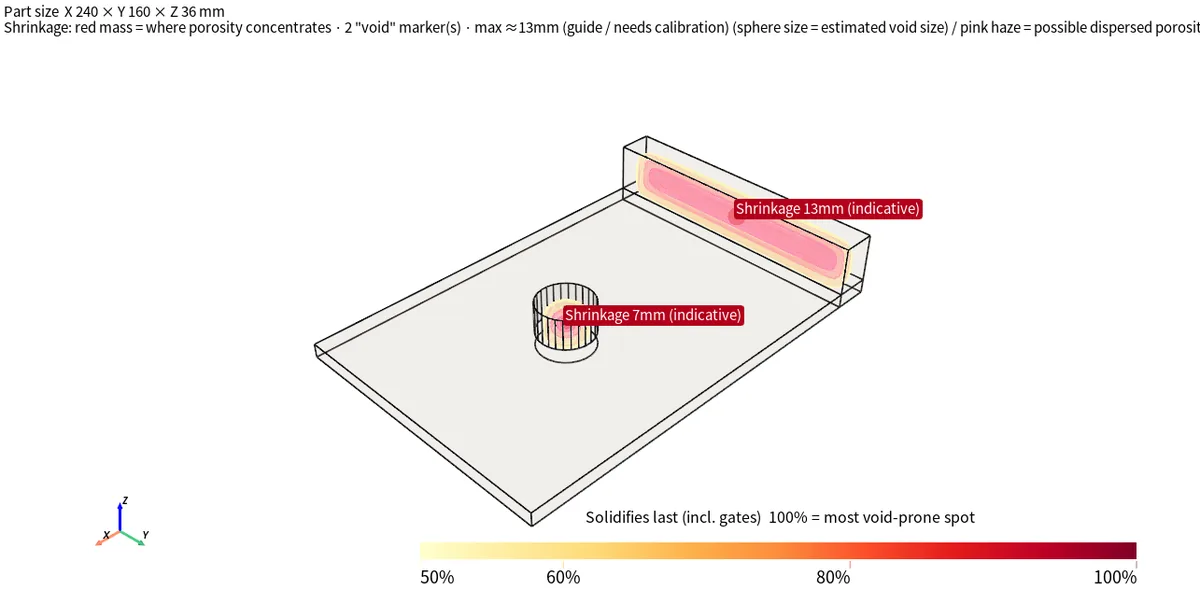
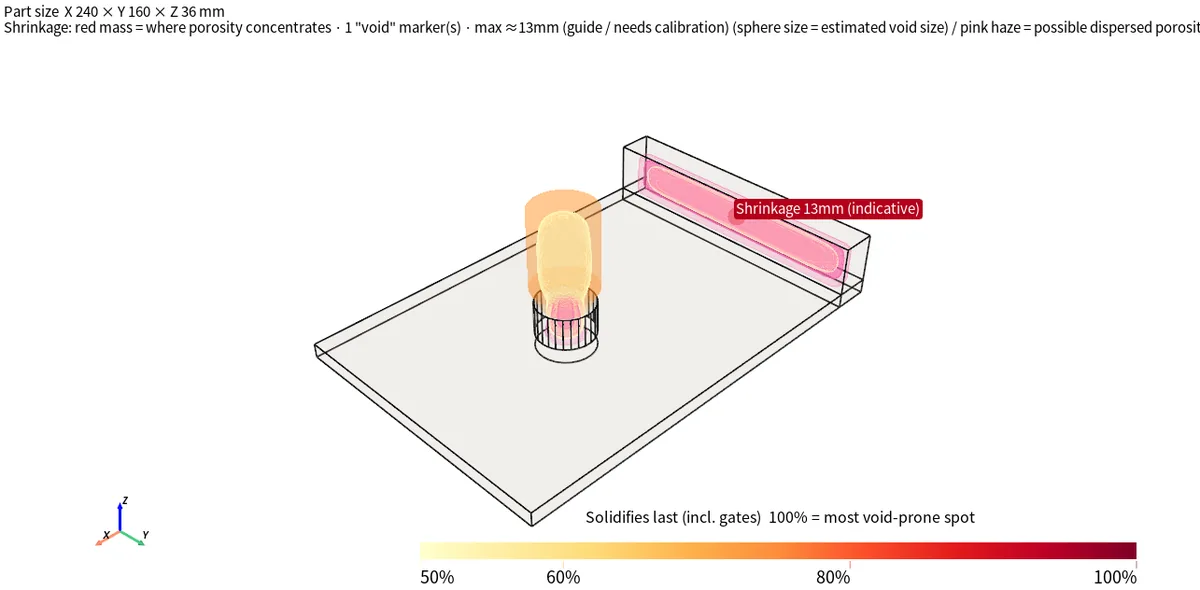
Porosity gathers where the metal solidifies last. The color shows how strongly.
The % on the bar is “closeness to the last-to-solidify spot”, not a probability of occurrence.
The void marker size (⌀) is a guide. Rely mainly on location and on comparing several spots with each other.
Filling tab — does the metal reach?
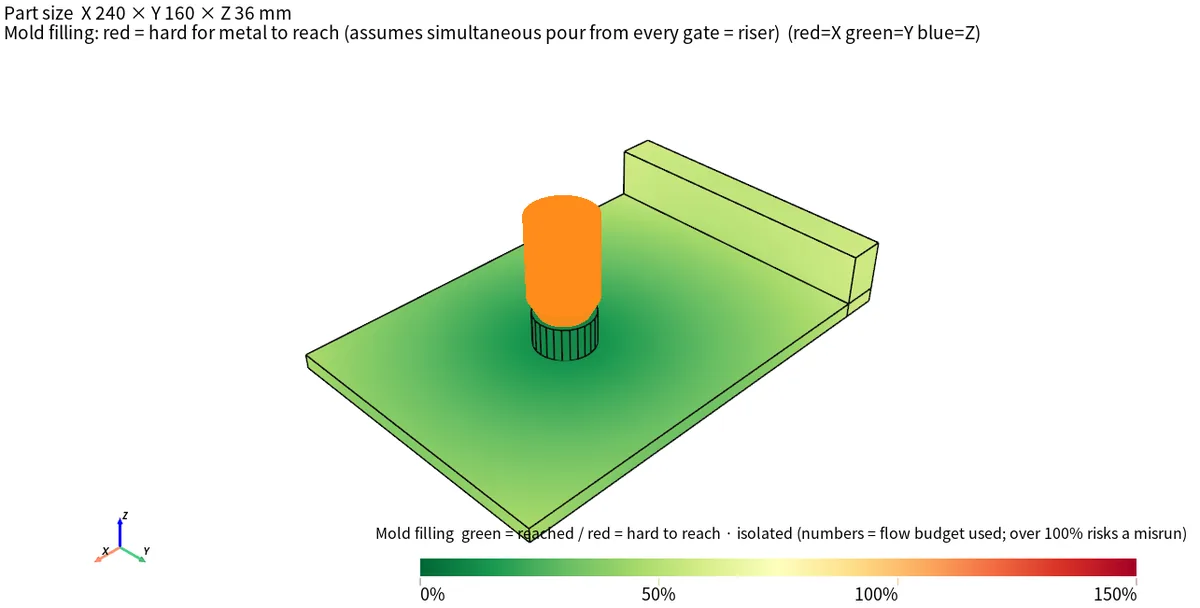
Starting from the risers (= where metal enters the part), it follows the flow path and adds up how hard it is for the metal to flow. Thin, long paths are harder to reach. Red = hard to reach or isolated.
Look at it with risers placed. Without risers, the metal is treated as entering over the whole bottom face, and it comes out far easier to reach than in reality.
When you calibrate mold filling, always do it with the rigging in place.
Thick parts may not show red at all. That is a result — mold filling is unlikely to be a problem for that part — not a fault.
Surface sink tab — will the surface sink?
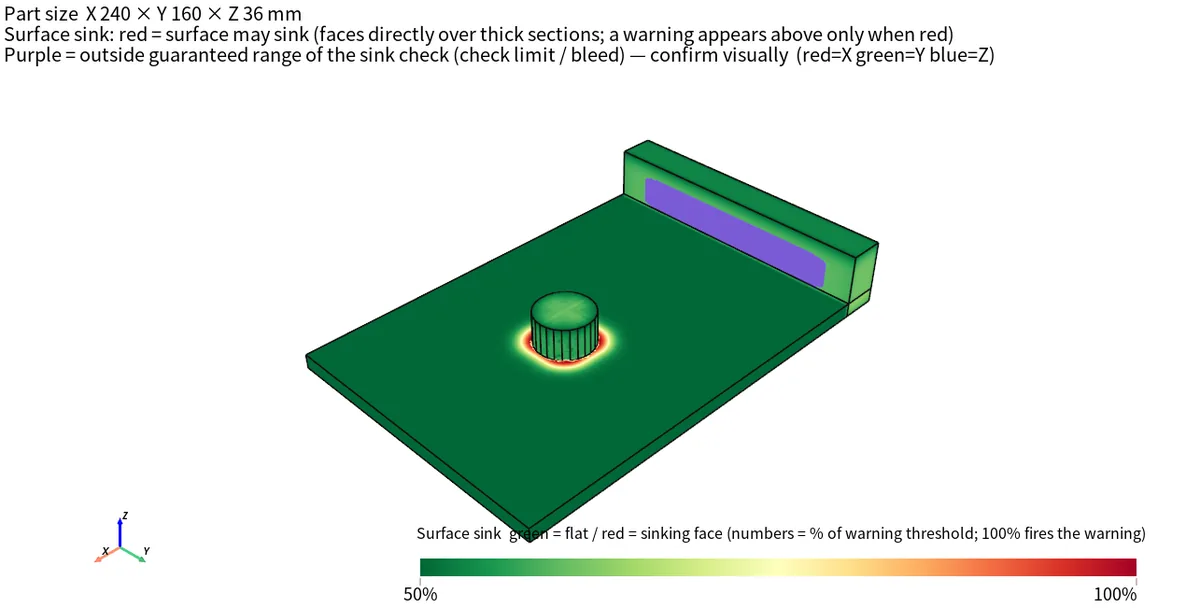
It looks for spots that are thicker than the walls around them. Heavy sections behind thin walls, bosses, hubs, flanges and the area around a riser contact turn red. On a part of uniform thickness it does not fire (there is no difference to find).
Purple = outside the guaranteed range often appears here. Where the whole wall thickness fits inside the depth this check looks at, the method cannot assess it. It says nothing about whether the wall thickness is good or bad. Judge purple areas from experience, as before.